Building a Web Application with Tomcat and MySQL: A Step-by-Step Guide
Introduction


Table of contents


No headings in the article.
In today's digital era, web applications have become an integral part of our daily lives. From social media platforms to e-commerce websites, these applications provide us with seamless user experiences and powerful functionalities. Behind the scenes, there are robust technologies working together to make these applications possible.
One such combination is Tomcat and MySQL. Tomcat, a widely used Java-based web server, provides a reliable and scalable environment for hosting web applications. On the other hand, MySQL, a popular open-source relational database management system, offers a robust and efficient way to store and manage data.
In this step-by-step guide, we will explore the process of building a web application using Tomcat and MySQL. We will dive into the key concepts, configuration steps, and best practices that will help you harness the full potential of these technologies.
Whether you are a seasoned developer or a beginner in web application development, this guide will provide you with valuable insights and practical knowledge to get started with building your own web application using Tomcat and MySQL.
So, let's embark on this exciting journey and learn how to build a web application that is reliable, scalable, and data-driven with the powerful combination of Tomcat and MySQL.
Let's start the task....
Open the Aws Management console and login into your account.
Go to the launch instances in the AWS console and create instances as per below steps.
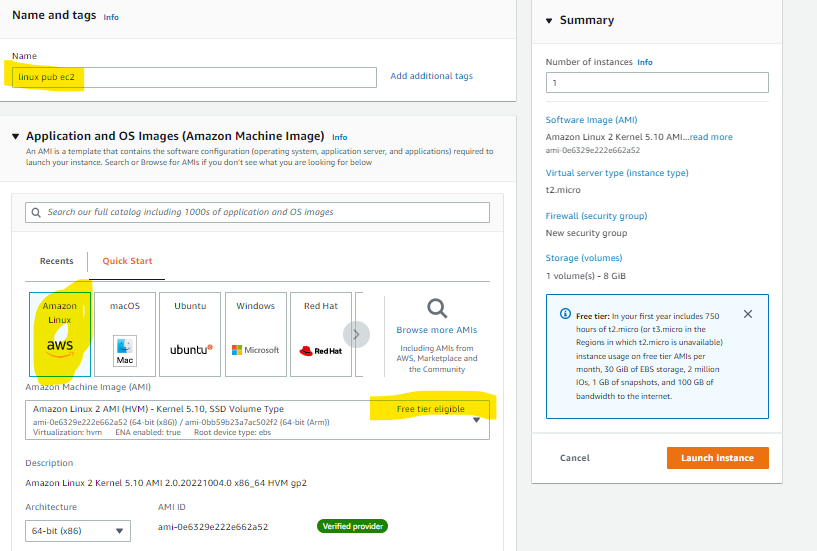
- Select public subnet and select sg- ssh & tomcat(8080). For private ec 2 select sg- ssh&mysql(3306)

- Connect public instances to terminal app

After connect public ec2 in Terminal and new tab , secure pem file from physical machine to local public ec2 (bastion host) .
Commad is scp -I ……..pem …….pem ec2-user@public ip address:~

Install java
sudo yum -y install java-1.8.0 java-1.8.0-devel
after installation check version ( java -version)

Download Tomcat Binary in /home directory from bowser
Command is wget https://archive.apache.org/dist/tomcat/tomcat-7/v7.0.94/bin/apache-tomcat-7.0.94.tar.gz
Extract tar file command is tar xvf apache-tomcat-7.0.94.tar.gz

Now Install git and clone java code
Sudo yum install git -y
By using java code is cloned

Open cd aws-rds-java
Then cd src/main/webapp/
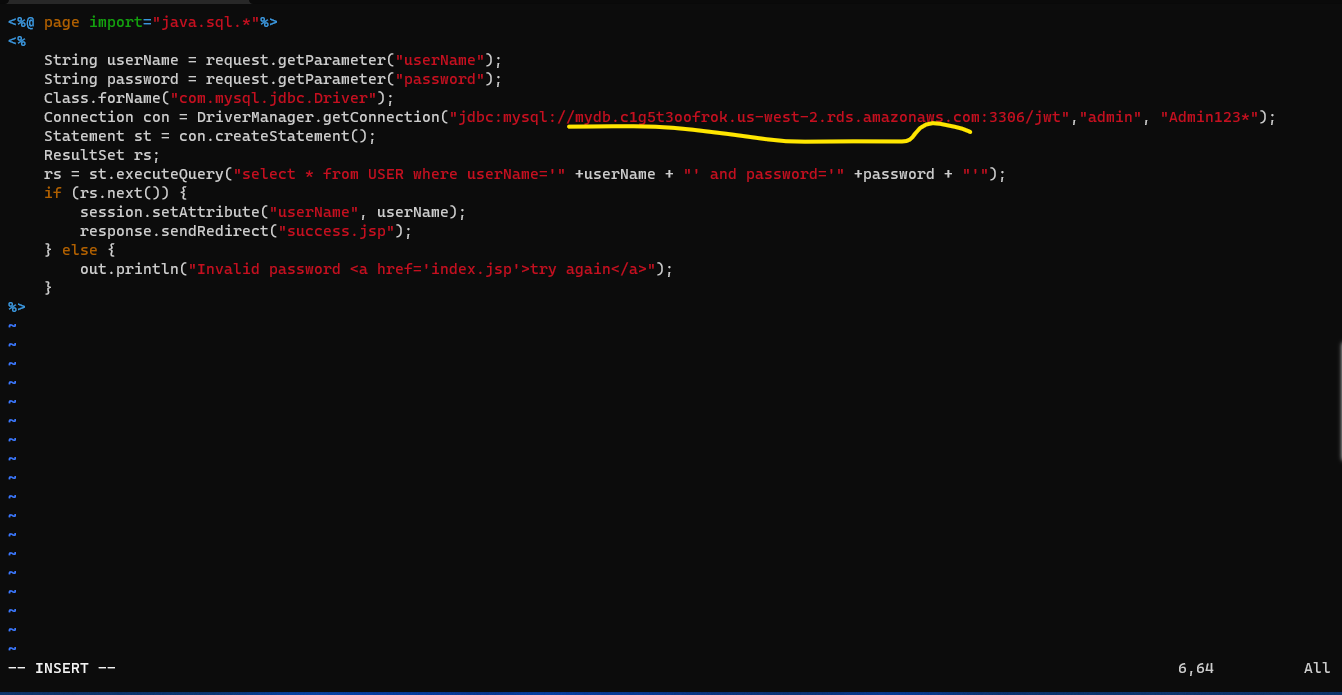
Edit file sudo vim sudo login.jsp and userRegistration.jsp

Edit 6th line in both login.jsp & userRegestration.jsp and paste RDS endpoint
After go back to home directory cd ~
Open cd aws-rds-java directory.
Install maven sudo yum -y install maven
Run maven package
After mvn package installed in aws-rds-java directory . You will find Target dir & loginwebapp file.
This Loginwepp file cp and paste in tomcat apache file.

Before copying file, check the port 8080 is run or not.
Sudo netstat -ntpl.

See above pic there is no port 8080.
For this You have startup the tomcat apache webserver.
cd apache-tomcat-7.0.94/
./bin/startup.sh

Copy Public ec2 ip address and paste it browser.
Ip:8080

In aws-rds-java/target/
Copy war file paste it in apache-tomcat/webapps/

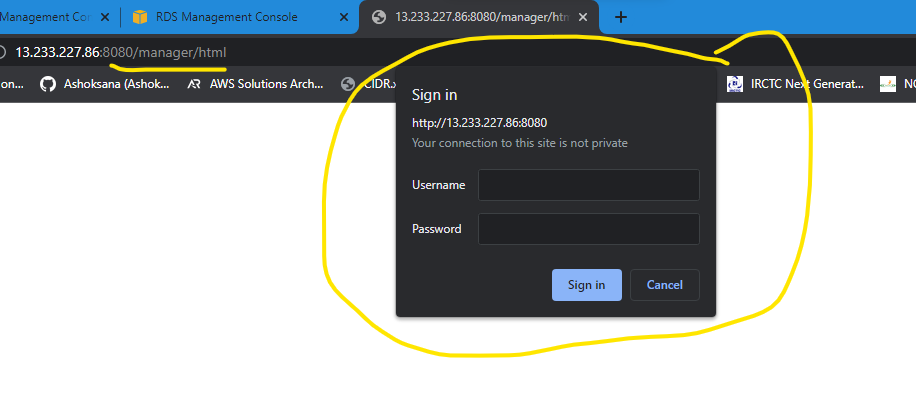
Now reload apache-tomcat file. And click the right side manger app.
You see sign option and press cancel.
Then after get 401 error page. Go back to terminal and open cd apache-tomcat-7.0.94/
Edit sudo vim conf/tomcat-users.xml
Then after press Shift+g,

After press Shift+g. you get like this interface.
Above <tomcat user> paste this <role rolename="manager-gui"/>
<user username="tomcat" password="tomcat" roles="manager-gui"/>
- Then save and exit :wq

After that shutdown tomcat server and again startup server
cd apache-tomcat-7.0.94/
./bin/shutdown.sh
./bin/startup.sh
Reload the tomcat server
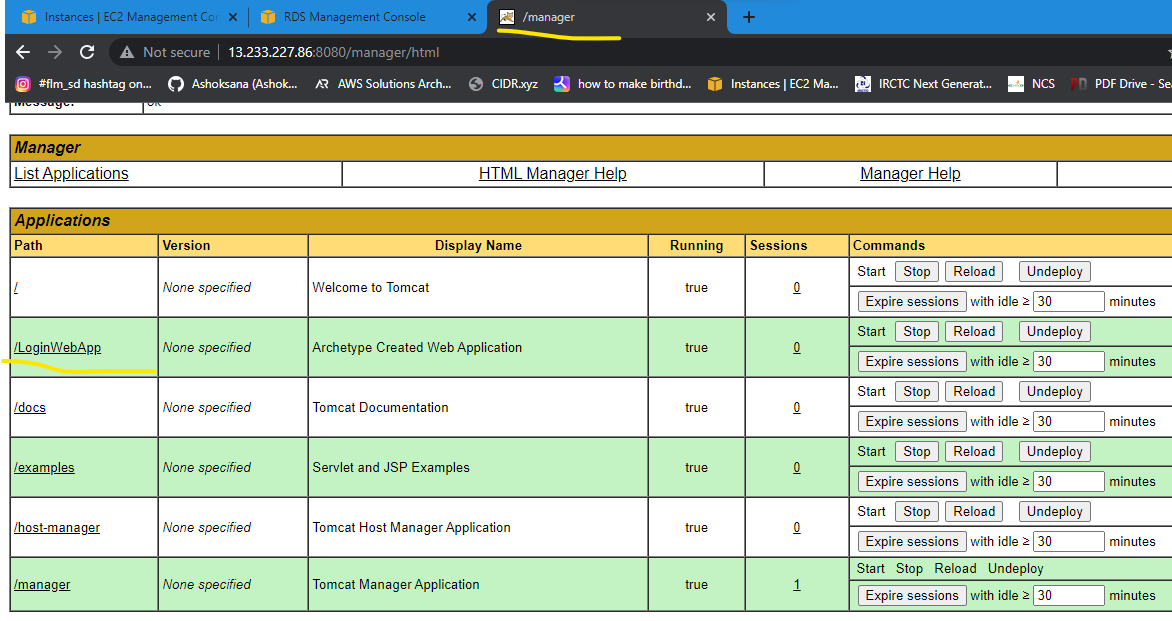
Click manager app, user “tomcat” password “tomcat”
After this type web page will come. And login option also will seen.
In pub ec 2 instances securely copy pem file and paste it in private instance
Before that chmod 400 …..pem file
Then scp -i …..pem ……pem ec2-user-pvtip:~ (Bastion host)
Now connect pvt ec2 instances in pub ec2 instances.
Install mysql client in pvt ec2 instance.
sudo yum -y install mysql

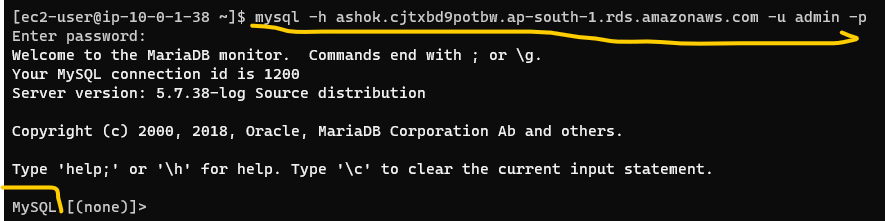
And connect the data base of RDS .
Command is mysql -h DB endpoint address -u admin (user) -p and press enter
And create db in name of ‘jwt’ (create datebase jwt;)
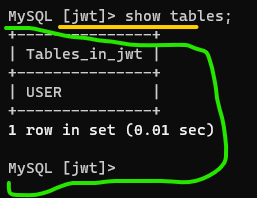
Create tables in jwt data base.
Select database (use jwt;)
CREATE TABLE
USER(
id int(10) unsigned NOT NULL auto_increment,
first_name varchar(45) NOT NULL,
last_name varchar(45) NOT NULL,
email varchar(45) NOT NULL,
username varchar(45) NOT NULL,
password varchar(45) NOT NULL,
regdate date NOT NULL,
PRIMARY KEY (`id`)
) ENGINE = InnoDB DEFAULT CHARSET = latin1;
Now go back to tomcat web page and click loginwepp.
Then register in that page.
1st name; Ashok; last name: Sana; email: sanaashokreddy1997@gmail.com; User name: Reddy; password: reddy123
And click submit.
And go back to tables of db jwt and show tables above date is seen in our tables.


Conclusion:
Congratulations on completing our step-by-step guide to building a web application with Tomcat and MySQL! You've learned how to create a powerful and efficient web application using Tomcat as the web server and MySQL as the database management system.
Here are the key takeaways:
Tomcat provides a reliable platform for hosting Java-based web applications, while MySQL offers a robust and efficient way to store and manage data.
You've learned how to configure Tomcat and MySQL, including setting up server environments, creating databases, configuring connections, and deploying web applications.
Remember to follow best practices for securing your applications, optimizing performance, and monitoring.
Building web applications is an iterative process, and with the knowledge gained from this guide, you'll be able to enhance your application's performance, security, and functionality over time.
Thank you for joining us on this journey. If you have any questions or feedback, feel free to reach out. Happy coding and best of luck with your future web application projects!
#Tomcat #MySQL #WebApplication #Java #Database #Development